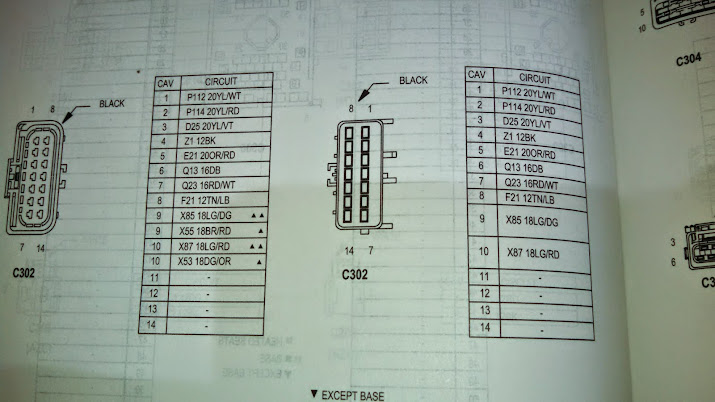
2001-jeep-grand-cherokee-specs-engine-size-3100cm3-fuel-wiring-diagram.pdf
1 / 91
100%
Download Full Diagram Via this App!!!!
Get Diagram Now! DOWNLOAD NOW
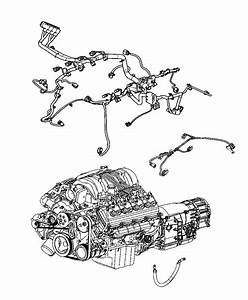 Title : 2001 Jeep Grand Cherokee Specs Engine Size 3100cm3 Fuel Wiring Diagram
Category : Wiring Diagram
Format : PDF
Title : 2001 Jeep Grand Cherokee Specs Engine Size 3100cm3 Fuel Wiring Diagram
Category : Wiring Diagram
Format : PDF


/cdn.vox-cdn.com/assets/1084809/i9300-specs.png)


